Holiday Baking Recap Part 4: Black-and-White Cookies

One of my favorite treats that's unique to Rochester is a cookie called Half Moons. They are large cookies -- their footprint is a little smaller than a CD. They can be chocolate or vanilla, and the texture is kind of like a brownie. One half is frosted vanilla, half chocolate. And they aren't cheap! A pack of four of them will put you back about four bucks at Wegmans (who makes the best ones).

I thought I'd try to replicate them as part of my holiday baking. I searched online and the closest thing I could find was Black-and-White Cookies, which are popular in New York City. The only Black-and-White Cookies I've tried in New York City have been prepackaged things at airports, which I can't believe are as good as the real thing. But they've given me a sense for what they are. My sense is that they are smaller and maybe a bit cakier than our Half Moons. But I figured they'd be a good place to start.

I chose Gale Gand's recipe from the Food Network because I've met her and she's nice. The only thing I changed is that I didn't use lemon extract, and increased the vanilla extract to 1/2 teaspoon.

The cookies themselves turned out great. They were cakey but they didn't fall apart when I turned them upside down to ice them. I didn't like her icings, though. They were too thin and hard. I ended up switching to another Food Network recipe for icings, and they were perfect. The cookies shown above use the preferred frostings. In the end, they weren't Half Moons, but they were the next best thing.

This concludes my holiday baking recaps. Come back next week, when I'll post my "Bests of 2006!"

Here are the recipes:

Black-and-Whites
Gale Gand, from the TV Food Network site

8 tablespoons (1 stick) unsalted butter
1 cup granulated sugar
2 eggs
1/2 cup whole, 2 percent fat, or 1 percent fat milk
1/4 teaspoon pure vanilla extract
1/8 teaspoon pure lemon extract (I didn't use)
1 1/4 cups cake flour
1 1/4 cups all-purpose flour
1/2 teaspoon baking powder
1/4 teaspoon salt

Vanilla and chocolate icing, recipes follow (didn't like these)
Vanilla Icing:
2 cups confectioners' sugar
3 tablespoons milk
1 teaspoon pure vanilla extract

Chocolate Icing:
1/2 vanilla icing recipe
2 tablespoons cocoa powder
2 tablespoons milk

Preheat the oven to 350 degrees F.
Line a baking sheet with waxed or parchment paper. In a mixer, cream the butter. Add the granulated sugar and beat until fluffy. Add the eggs, milk, and extracts and mix to combine. In a large bowl, combine the flours, baking powder, and salt and mix well. Add the dry ingredients to the sugar-egg mixture and mix to blend. Using an ice-cream scoop, scoop the dough onto the prepared pans. With a spatula, press and spread each cookie into a circle about 2 1/2 inches in diameter and about 3/8-inch thickness. Bake for about 15 to 20 minutes, until golden. Let cool on wire racks.

For the icing: In a medium bowl, stir the sugar, milk, and vanilla together until it forms a smooth icing. Transfer half of the icing to another bowl and stir in the cocoa powder and milk until smooth.

When cool, turn cookies over, so the flat side faces up. Spread white icing on half of each flat surface, then spread the other half with chocolate icing. Let set at room temperature for 30 minutes.

The icings I preferred, also from the Food Network:

Chocolate Icing:
6 ounces semisweet chocolate, finely chopped
1/2 cup heavy cream

White Icing:

2 1/2 cups confectioners' sugar, sifted
2 tablespoons light corn syrup
1 tablespoon lemon juice (didn't use -- increased water accordingly)
2 tablespoons warm water

For the chocolate icing: Put the chocolate in a medium heatproof bowl. Bring the cream to a boil in a small saucepan; pour over the chocolate. Shake the bowl gently so cream settles around the chocolate; set aside until the chocolate melts, about 5 minutes. Whisk until smooth, taking care not to incorporate too many air bubbles.

For the white icing: Whisk the confectioners' sugar, corn syrup, lemon juice and warm water together to make a smooth icing.

Holiday Baking Recap Part 3: Cookie decorating

Whenever I see photos of beautifully decorated cut-out cookies in magazines, I say to myself, "I could do that." And then I don't. Whether it's cookie decorating, scrapbooking, or sewing, I have a hard time sitting still and focusing on such things in solitude. I do much better in a class or group setting.

With that in mind, I invited three friends over for a morning of cookie decorating about a week before Christmas. I told them to bring a couple dozen of their favorite cut-outs (which could be purchased, if they preferred) and I'd supply the frostings and decorations. I also provided breakfast (quiche and fruit). I really enjoyed it. It was fun, relaxing, and even productive. Three people were just the right number of people, because we could all fit around one table and there was plenty of room to spread out. And the cookies, as you can see, came out really nice.


Here are the recipes I used for the cookies:

Shortbread cut-out cookies

I like making these because the are delicious and buttery and they don't spread. The only downside of them is that they are rather fragile. I usually double this recipe, but it doesn’t seem to work if you make more than two batches at a time.

1 cup (2 sticks butter), room temperature
1/2 cup sugar
2 1/2 cups flour
1 teaspoon almond, vanilla, or lemon extract, if desired

Cream together butter and sugar. Blend in flour. When dough is well mixed, pat into a ball and refrigerate for 2 hours.

When ready to make cookies, heat oven to 300 degrees. Roll cookies on floured surface to 1/4-inch thickness. (You will probably need to use flour on top of dough, too.) Cut with cookie cutters dusted in flour. Placed on ungreased cookie sheet. Re-roll dough until all is used.

Bake for 20 – 25 minutes until brown around the edges. Cool for 15 minutes. They are less likely to break if you pick them up with your fingers holding the widest part of the cookie. Decorate as desired. Makes 2 – 3 dozen, depending on size of cookie cutter.

Confectioner’s Sugar Glaze
I like to use a glaze rather than a frosting. It's not as hard as royal icing, but makes a smooth, shiny finish.

1 cup confectioner’s sugar
2-3 tablespoons milk
1/4 teaspoon vanilla extract (or extract of choice)
Food coloring, if desired

Mix all ingredients together. Brush or spread over cookies. If using sprinkles, sprinkle when cookies are wet.

Martha Stewart's Eggless Royal Icing
This is great for outlining and drawing.

1 pound confectioners' sugar (aka powdered sugar)
5 tablespoons meringue powder (powdered egg whites also work)
Liquid or gel-paste food coloring (optional)

In the bowl of an electric mixer fitted with the paddle attachment, combine sugar, meringue powder, and a scant 1/2 cup water on low speed. Beat until mixture is fluffy yet dense, 7 to 8 minutes.

Test the consistency by lifting a spoonful of icing and letting it drip back into the bowl; a ribbon should remain on the surface for 5-7 seconds. If not using immediately, transfer to an airtight container (icing hardens quickly when exposed to air), and store at room temperature for up to one week. Beat with a rubber spatula before using. Makes about 2 1/2 cups.

Holiday Baking Recap Part 2: Chocolate Caramel Brownies

My Christmas baking seemed to be characterized by my screwing up recipes I've made for years. My go-to biscotti recipe fell apart as I was slicing it for its second baking. My cut-out cookies kept breaking. I even botched one of my easiest recipes -- chocolate caramel brownies. (The photo here is of them done correctly!)

This brownie recipe includes German Chocolate cake mix, evaporated milk, and so on. You are supposed to make a brownie type mixture, put half in a pan and bake it for eight minutes or so. Then you add caramel, chocolate chips, and the rest of the brownie mixture.

I hadn't made it in awhile, and layered everything in the pan at once, forgetting to bake the bottom layer first. As a result, they were much flatter than usual. The rub of it is that I had decided to bake two pans at a time -- so I messed up two whole pans of brownies. They weren't terrible, but they weren't good enough to put in gifts or take anywhere. We're still snacking on them.

For grins, here's the correct version of the recipe I use:

Caramel Brownies

1 pkg. German chocolate cake mix
3/4 c. melted butter
2/3 c. (5-oz can) evaporated milk, divided
1 bag (14 oz) caramels
12 oz. package chocolate chips (I use semisweet)

Preheat oven to 350.

Mix together cake mix, butter, and 1/3 cup evaporated milk. Pat half of the mixture in the bottom of a greased 9x13 pan. Bake for 8 minutes.

While the bottom layer is baking, peel the caramels. Place in a saucepan with 1/3 cup evaporated milk. Heat and stir until all caramels are melted.

Remove brownies from oven and sprinkle chocolate chips on top. Drizzle caramel sauce over chocolate chips. Drop the rest of the brownie mixture in dollops on top of th caramel.

Bake for an additional 20 minutes. Remove and let cool.

Holiday Baking Recap Part 1: New York Crumb Cake

For some reason, I couldn't get all that excited about Christmas this year. I have a hunch it had to do with the weather. It was very mild, with more rain than snow (I guess all our snow went to Denver). We only had one snow that covered the grass, and it didn't last for very long. I'm not complaining -- it was quite pleasant -- but it just didn't seem like the holidays. The good news is that I didn't get my usual Christmas cold, and the whole family was healthy throughout the holiday.

The boys didn't seem to miss the decorations that didn't get put up or the baked goods that didn't get made. And perhaps I was a little more easy going throughout the season. Anyway, I thought I'd recap the baking I did manage to do in a few posts.

I told my mother-in-law I'd bring some kind of a baked good for Christmas breakfast. I thought I'd bake a crumb cake like the ones they sell at Wegmans and Starbuck's. (The Wegmans ones are better than the ones at Starbuck's.) The consist of a moist yellow cake base, with a cinnamony crumb topping that's twice as thick as the cake.

I found the recipe on one of the online food boards, and it came from Martha Stewart Living. The only hitch in this recipe is that it said to use a 9 by 12 1/2-inch pan. Well, what the heck is that? Isn't that about the same as a 9 by 13-inch pan, which most people have? That is what I decided to use -- in fact, I used my 9 by 13-inch Kaiser Bakeware springform pan. When I spread the batter on the pan, it was really thin and I contemplated scraping it out of that pan and moving it to a smaller pan. But the cake part is pretty thin in the cakes I like, so I fearlessly moved ahead with the recipe.

The cake ended up tasting good, but it was too thin. I may try the recipe again, but use a smaller pan. I have to say, though, that I loved the Kaiser springform pan. The cake was perfectly level, and using the springform pan made every piece come out perfectly.

New York Crumb Cake

2 tablespoons canola oil -- plus more for pan
4 cups all-purpose flour -- plus more for dusting pan
1/2 cup granulated sugar
2 1/2 teaspoons baking powder
1/2 teaspoon salt
1 large egg
1/2 cup milk
2 teaspoons pure vanilla extract
1 cup light brown sugar -- firmly packed
1 1/2 teaspoon ground cinnamon
1 cup unsalted butter -- (2 sticks) melted and cooled
Confectioners' sugar -- for dusting

Place rack in center of oven and heat to 325 degrees.

Lightly brush a 9 by 12 1/2-inch baking pan with canola oil, dust with flour and tap to remove excess. Set aside. In a medium bowl, sift together 1 1/2 cups flour, granulated sugar, baking powder, and salt; set aside. In a second bowl, whisk together egg, milk, canola oil, and vanilla. Using a rubber spatula, fold dry ingredients into egg mixture until just combined.

Spread batter evenly into prepared pan, and set aside. In a medium bowl, combine remaining 2 1/2 cups flour, brown sugar, and cinnamon. Pour melted butter over flour mixture and toss with a rubber spatula until large crumbs form.

Sprinkle crumbs over batter and bake, rotating pan after 10 minutes. Continue baking until a cake tester comes out clean, about 10 minutes more.

Transfer baking pan to a wire rack to cool. Dust with confectioners' sugar. Using a serrated knife or bench scraper, cut into 3-inch squares. Store in an airtight container up to 3 days.

Worst gingerbread house. Ever.

I know what you're thinking. That gingerbread house couldn’t be the worst gingerbread house ever. It's actually quite nice. Well, that's not our family’s gingerbread house. That's the gingerbread house our friends' family created during our annual afternoon of gingerbread houses. Ours didn’t turn out this way at all.

Let me start by saying that I know something about gingerbread. I don't enter gingerbread competitions (too much work), but in addition to our annual afternoon with friends, I made houses with both of my sons’ preschool and Kindergarten classes. And I’m not talking about those stupid creations involving graham crackers stuck to milk cartons with canned frosting. I’m talking the real stuff, redolent with spices, stuck together with rock-hard royal icing.

From my experience, the critical element in successfully constructing and decorating a gingerbread house is royal icing. My tried-and-true recipe, from Martha Stewart, is like super glue for gingerbread. The recipe is at the end of this post.

The kids and I prepared for our afternoon of gingerbread. We visited the gingerbread houses at the Eastman House. We watched the Gingerbread Championships on Food TV. During the TV program, we spotted a quick shot of Snoopy's doghouse, decorated as in a scene from “A Charlie Brown Christmas.” We agreed that that was what we wanted to make this year. I thought it would be pretty simple -- red walls, a white house, some Christmas lights, maybe a few assorted trees. We could even include Snoopy and Woodstock.

Our friend, Mike, is a financial planner, but he’s freakishly talented at making characters and animals out of things like Tootsie Rolls, Starburst fruit chews, caramels, etc. His wife – she’s an art director, so we’ll call her AD here – doesn’t always appreciate Mike’s efforts. She usually has a firm, clear vision of what the family will create, and his creatures and critters often don’t fit the theme. Since I try to follow a “process, not product” philosophy of family gingerbread creations, Mike’s creations often wind up on our houses. That’s his Spongebob and Patrick in front of the house we created last year. Cute, huh?

My husband, Tom, isn’t quite as talented as Mike in the creatures department but he’s no slouch either. I figured out one of those guys could fashion a reasonable Snoopy and Woodstock, and I even spent $3.99 on a can of marzipan for them to use. (Marzipan is what’s used by professional cake decorators – or, at least I think it is. I figured it would be easier to work with than Tootsie Rolls.

The one thing I didn’t do, which I usually do, is to assemble the house ahead of time and let it dry before decorating it. Looking back, I think it was my fatal flaw.

When we arrived at AD’s house, I made the royal icing, but noticed it wasn’t quite as stiff as usual. I probably didn’t beat it long enough, but we were running late and everyone was anxious to get started. Cocky with the fact that I’ve never had a problem making a gingerbread house before, I put the pieces together. (The pieces, by the way, were purchased at Wegmans for $4.99.) The house held together reasonably well, so it was on to decorating the house.

I divided out some of the royal icing and dumped in all of the red gel color I had with me. The icing was pink, not red. I decided “good enough” and sons and I proceeded to slather it all over the walls of the house. When AD saw the color, she suggested we sprinkle the walls with lots of red sugar to make them look really red. Now I should know from my years at ad agencies that the ideas of art directors are often more time consuming then they seem, but I forged ahead. We tilted the doghouse slightly to put the red sugar all over the walls. The first wall went fine, and it did look redder. B.(age 11) decided to help tilt the house, and before I could say “be sure to support the house as you tip it,” the whole doghouse fell apart.

I took a deep breath. No problem, I said, this will make it easier to put the sugar on the walls. We laid the walls flat, sprinkled all the red sugar we had on the walls, then put the house back together again, leaving fingerprint indentations in the icing. Once it was back together, we slapped white icing on the roof to resemble snow. At that, AD said “isn’t one of your walls sloping inward?” Sure enough, the house was ready to implode again. So I carefully repositioned the walls yet again, leaving more fingerprint indentations on the house.

While all this was going on, Tom worked on a marzipan Snoopy, and did a pretty good job. Since the marzipan had a brownish color, he used his fingers to spread white royal icing all over the marzipan. The icing didn’t go on smoothly, so Snoopy looked like he was part poodle – kind of a cross between Snoopy, and our dog, Charlie (left). Tom fashioned ears out of Tootsie rolls and put on an M&M nose and placed Snoopy/Charlie on top of his house.

At that, I noticed that the top of the roof had a gap and looked like it could slide off the house. I put some waffle-shaped pretzels across the top to give us a base for filling it in with icing.

B made a path out of caramel creams. D. iced some sugar cones to make them resemble snow-covered trees. He also made a dog dish and a wreath for the house. I colored the rest of the marzipan yellow and molded a Woodstock. I did an ok job on the body but couldn’t figure out how to make his feathers.

At this point, I was sick of the whole process, and it was clear that the house was going to take a long time to dry. We decided to call it quits for the day, let it dry and finish it later. Here’s what it looked like at the end of that day. We got it home in one piece and put it on the dining room table to dry.

The next morning, I decided to finish it. I went to Wegmans and brought some strawberry fruit roll-ups, which I thought would make for even better red walls. I also bought some shoestring licorice to make the Christmas lights that Snoopy hung.

When I got home, our house looked different. All but one of the caramel creams in the path was gone. So was one of the trees. It dawned on me that we left it where Charlie, also known as BD, for Bad Dog, or FD, for ... well, you can figure it out, could get at it. The stinker had snacked on our house.

Now I was in a quandary. The tradition in our family is that the kids eat the gingerbread house on New Year’s Day. Yes, I let them eat the stale, dusty candy off the house, and yes, I admit that it’s a completely gross tradition. I dreamed it up the first year we made a gingerbread house. I wanted the boys to keep our gingerbread creation intact throughout the holiday season, and I figured that if they knew they’d get to eat it eventually, they’d stay away from it. I was right. I also figured the old dusty candy would be yucky enough that they wouldn’t really eat it. I was wrong.

When the boys got home from school that day, I proposed pitching the gingerbread house in the trash and forgetting it until next year.

“What would we eat on New Year’s Day?” they protested.

“Guys, it was a gross tradition to start with, and now the house has lots of dog germs on it! I’ll put out a big bowl of candy, and you can eat it fresh out of the wrappers!” I said.

“It won’t be the saaaame,” they moaned.

The next day, I decided to finish the house – even though I’d stand firm on not letting them eat it. I fixed the snow on the roof and adhered some shoestring licorice and mini M&Ms to make Christmas lights around the roof. I ran out of royal icing and set it aside for awhile.

A few hours later, the rest of the trees were gone, Woodstock was gone, and Snoopy was missing an ear. FD.

I’m done. The damn dog house sits on a shelf in my dining room, half finished. I refuse to finish it, but can’t bring myself to pitch it either. It’s emblematic of the way this Christmas season has gone – I put up half of the Christmas lights, but didn’t finish when I couldn’t find any more extension cords. The snowmen and Santas are on display, but the Nativity scenes are still in a box (no, this isn’t about priorities ... it’s just about what boxes I randomly opened first). The gifts are half wrapped in a variety of places, and I’m not entirely sure what I’ve purchased for whom.

I think I have my solution to the whole gingerbread house/New Year's Day dilemma. I’m going to buy some graham crackers, store bought frosting, little milk cartons, and some more candy. The boys can make and eat their own houses on New Years Day. Suddenly those graham cracker houses don’t seem so stupid after all.

Martha Stewart's Eggless Royal Icing

Makes about 2 1/2 cups -
1 pound confectioners' sugar (aka powdered sugar)
5 tablespoons meringue powder (powdered egg whites also work)
Liquid or gel-paste food coloring (optional)

In the bowl of an electric mixer fitted with the paddle attachment, combine sugar, meringue powder, and a scant 1/2 cup water on low speed. Beat until mixture is fluffy yet dense, 7 to 8 minutes.

Test the consistency by lifting a spoonful of icing and letting it drip back into the bowl; a ribbon should remain on the surface for 5-7 seconds. If not using immediately, transfer to an airtight container (icing hardens quickly when exposed to air), and store at room temperature for up to one week. Beat with a rubber spatula before using.

Gingerbread Houses at the Eastman House

The George Eastman House, the beautifully restored home of the late founder of Eastman Kodak Company, has an annual display of gingerbread houses. The boys and I went for the third time this year. The houses are auctioned off and the proceeds benefit the George Eastman House.


The houses came from various parts of the community -- individuals, families, Scout troops, and various businesses all contribute. The boys were both interested in this year's exhibit, because both of their schools had a house on display. The one at right is from a class in my younger son's school.


This year, the quality of the gingerbread houses was very good. In the past, some of the school and Scout entries seemed a little slapdash, but this year even those showed thought and skill. My favorite house was the one at right. A photo doesn't really do it justice, because all the glasses had a stained glass effect, with a candle in every window.


I didn't keep track of who created each piece (perhaps I should have if I was going to put them on the blog), but I would think that this Leaning Tower of Pisa would have been especially challenging to construct.


This house was a replica of a historic building in a nearby town. It struck me as a good likeness. Based on my experience with frosting, I'm guessing it was a real challenge to get the colors of the icing just right.


The "Three Little Pigs" house was simple in construction, but clever in terms of concept. The pigs were especially well executed. If you look closely at the far left, you can see the Big Bad Wolf eating a piece of one of the houses!


This house was created to advertise a production of "Cinderella." It was impressive.

They were all impressive, that is, until we watched the National Gingerbread Championship on the TV Food Network. Those were absolutely phenomenal. We were especially impressed with three teen sisters' depiction of a town in the Harry Potter books. In the adult division, people spend hundreds of hours constructing entire villages in intricate detail. All this for a $1,000 grand prize -- they are nuts, if you ask me! I find it interesting that there are so many subgroups within the food contesting world -- areas like chili, pies, and gingerbread have die-hard competitors that often don't compete outside their specific realm.

Our family will give a gingerbread house a few hours' worth of effort tomorrow. We're going to another family's house to decorate our houses. We've been doing this with the same family for years (actually, there was a third family that started out hosting the gingerbread gathering, but they sadly moved out of the area). In the old days, we used to bake our own gingerbread. Now, we buy the pieces ready-made from Wegmans. At a price of $4.99, it's worth avoiding the hassle of baking the gingerbread. We're leaning toward a Snoopy doghouse theme, but we'll see if it actually goes that way. I'll post a photo of our results -- but don't expect anything like the creations you see here!

Adventures with Alton Brown's Pizza Dough(s)

“Family Pizza Night” is a fairly regular Friday night event in our family. Each of us makes our own pizza. When I get my act together a day in advance, I make my own dough. My usual favorite is from “Cooks Illustrated” magazine. Last time, I thought I’d use a recipe from “I’m Just Here for More Food” by Alton Brown (which I’ve had for awhile but haven’t used much).

Alton Brown is a running joke between Tom and me because of an encounter we had a couple of years ago, when we were in Hollywood for the Pillsbury Bake-off contest. We were having lunch in a Johnny Rockets restaurant that had glass walls looking out to an outdoor mall area. A nice couple that we had met walked by, and we gave them a wave. When they saw us, they excitedly ran into the restaurant toward us.

“We just met Alton Brown!” they exclaimed, and showed us the picture they had taken with him on their digital camera. We squinted at the display to admire the picture of them with a scruffy looking guy.

“That’s great! Cool!” we enthused, and they scurried off to find some others to tell.

When they were out of earshot, Tom said, “who the heck is Alton Brown?”

“I have no idea,” I replied, and we both cracked up. Guess you had to be there. Anyway, this has become kind of a running joke between us. I’ve watched Alton Brown on “Good Eats” since then, and I like it. I’m not much for all the scientific stuff he presents, but the unique way he presents information makes the show both entertaining and informative.

So back to the pizza crust. When I look at the recipe in the book, a couple of things had me scratching my head. First, it called for 8 cups (1 pound) of flour, for four small pizzas. This puzzled me, because it would seem like 8 cups of flour would weigh more than a pound, and would make more than four small pizzas. It also would challenge the capacity of my stand mixer.

Also, the recipe called for 25 mg children’s aspirin tablets, and it had notation that read “for the vitamin C.” I asked Tom to fetch me some children’s aspirin at the store, thinking all the while that I didn’t realize that children’s aspirin also contained vitamin C. Tom came home with 81 mg tablets, saying that was all he could find.

I couldn’t figure this out. Would I cut the tablet into quarters? I then looked at the aspirin box. No vitamin C listed anywhere. Huh.

I was puzzled enough that I decided to turn to the Internet. I suspected there’d be a review of this recipe or some sort of discussion about the aspirin somewhere. Sure enough, I found the information I was looking for on a couple of food blogs. Turns out, the recipe should have read 25 mg children’s Vitamin C (not aspirin), and it should have read 4 cups of flour, not 8. Whew! Saved by the food bloggers – what would we do without them?

I decided to go to the TV Food Network Web site to see if Alton Brown had a pizza dough recipe posted there. He did, but one that’s very different than the one in the book. For one, there was no Vitamin C in the Food Network version.

At this point, I looked up at the clock, and it’s now midnight. Is the Internet one giant black hole of time, or what? Still, I wanted to get dough in the fridge before I go to bed, so I decided to combine elements from both of Alton Brown’s recipes. I started by combining the following ingredients from the book recipe:

10 oz water
1 Tablespoon salt
1 teaspoon sugar
1 lb flour
¼ oz instant yeast (I use SAF instant yeast)

The book version said to mix for 2 minutes on low, rest the dough for 15 minutes, knead in the mixer for 5 minutes, knead by hand 30 seconds, let rise for an hour or so, then refrigerate. I didn’t have that kind of time, so I went with the Food TV version. Using the paddle attachment of my trusty KitchenAid mixer, I start mixing on low until the dough came together, then kneaded for 15 minutes on medium speed.

As directed, I then looked for the “baker’s windowpane.” I had a vague recollection of watching Alton Brown demonstrate this TV. The idea is to tear off a small piece of dough, flatten it into a disc, and stretch it until it’s thin. Hold it up to the light and look to see if a “taut membrane” has formed. I was pretty vague on what this “taut membrane” would look like, but the dough seemed ok to me. I repeated the whole process a second time (B. was having a friend spend the night, and 11-year-olds can consume a lot of food). I put the balls of dough into the fridge to use the next day. Whew!

The next day the dough had risen nicely in the fridge, and we (along with B.’s overnight guest) were ready to make pizzas.

I learned my usual method for rolling out pizza dough from “Cooks Illustrated” magazine. Basically, you roll out the dough on a piece of parchment. The uncooked dough sticks to the parchment, making it easy to roll thinly. You slide it, parchment and all, onto a baking stone. (This is much easier than using a traditional pizza peel.) When the dough bakes, it is released from the parchment.

Well, I was out of parchment, so I decided to use the Alton Brown book’s method of stretching the dough and getting it into the oven. It called for a series of maneuvers that ended with tossing the dough in the air “with a twist” and catching, a la your local pizza shop. The boys loved trying this method, and a few pieces of dough ended up in the floor (and subsequently in the garbage – trust me, you don’t want to eat off my floor).

Tom quickly abandoned this method and went back to the rolling pin. I stubbornly kept on with Alton’s method and eventually wound up with amoeba-shaped pieces of dough of varying thicknesses.

We topped them as directed. Tom and the boys went with the usual cheese and pepperoni. I used various odds and end from the fridge.

Alton Brown’s recipe called for the traditional method of getting pizzas into the oven --sprinkling cornmeal on a peel, then sliding it from the peel to the baking stone. I don’t have a peel, so I used a rimless cookie sheet.

The first time I did it, there wasn’t enough cornmeal and the pizza stuck to the pan. I managed to unstick it, but not without dislodging a lot of the toppings on the pizza. For the next pizzas, I used tons of cornmeal. The problem with this is that some stayed on the stone and some fell to the bottom my oven, and all of this excess cornmeal burnt and made my kitchen smell of burning cornmeal. In addition, some of it mounded up under the crust, making the crust bumpy in places.

Removing the pizzas from the oven was also a hassle. I grabbed a bit of the crust and tried to slide it back onto the rimless baking sheet. The hot toppings oozed around as I did so. This didn’t make for attractive pizzas. The bottom line from this experience: from now on, if I’m out of parchment, it’s Boboli crusts for us.

In the end, our pizzas were ok but far from exceptional. (Those are the boys' creations pictured at the top of this post.) I haven’t decided whether or not to give Alton Brown’s pizza dough recipes another try. If you’ve made a pizza dough using one of his recipes, I’d greatly appreciate it if you’d leave me a comment and let me know how it turned out!

Smoked Gouda and Caramelized Onion Quesadillas

My friend, Jamie, brought Smoked Gouda and Caramelized Onion Quesadillas as an appetizer to a dinner party awhile back. She thought they were just ok, but I thought they were excellent. I liked the combination of the sweet onions, salty prosciutto, and the smoky Gouda. Even though they are considered an appetizer, I make them for myself every so often, one or two at a time. I just refrigerate the caramelized onions that I don't use in the first batch. They are great with a soup or a salad. This is what I ate last night, when the rest of the family was eaten Kid Cuisines and frozen pizza.

SMOKED GOUDA AND CARAMELIZED ONION QUESADILLAS
(from Epicurious.com -- one of my favorite sources of online recipes)

2 tablespoons (1/4 stick) butter (I use 1 tablespoon butter and 1 tablespoon oil)
1 large onion, thinly sliced (I usually use two, but I love caramelized onions)
1 tablespoon golden brown sugar
1/4 teaspoon white wine vinegar

1 1/2 cups grated smoked Gouda cheese
4 10-inch-diameter flour tortillas (I usually use smaller ones)
2 ounces sliced prosciutto, chopped
2 tablespoons (1/4 stick) butter, melted

Melt 2 tablespoons butter in heavy medium skillet over medium heat. Add onion, brown sugar and vinegar; sauté until onion is golden brown, stirring frequently, about 25 minutes. Remove from heat. Cool to room temperature.

Preheat oven to 350°F. Sprinkle cheese over half of each tortilla, dividing equally. Sprinkle prosciutto and sautéed onion over cheese. Season with pepper. Fold other half of each tortilla over cheese mixture. Brush tortilla with some of melted butter.

Brush heavy large skillet with some of melted butter (I brush the tortillas, not the skillet). Place over medium-high heat. Working in batches, cook quesadillas just until brown spots appear, brushing skillet with butter between batches, about 2 minutes per side. Transfer quesadillas to heavy large baking sheet.

Bake until tortillas are golden and cheese melts, about 5 minutes. (If the cheese melts when you cook them in the pan, which it sometimes does, this step is unnecessary.)

Transfer quesadillas to work surface. Cut each into 6 triangles. Arrange on platter and serve hot.

Red Velvet Cupcakes with White Chocolate Peppermint Cream Cheese Frosting

One of our family's traditions is to celebrate the half-birthdays of our sons. I started this tradition because my older son's birthday is right after Christmas, and it seemed like a long time for him to go without having a special day. It's just a little celebration within our family. The birthday kid picks out dinner. For dessert, I usually make one layer of a cake, cut it in half, and frost it to look like half of a two-layer cake. We light one candle and sing "Happy half-birthday." The child gets one moderately priced gift.

For my younger son's half-birthday celebration, which we celebrated today, I suggested making cupcakes instead of the traditional half of a cake. We're going to a dinner tomorrow, and I said I'd bring dessert. I figured cupcakes would be something fun to bring for the kids.

My son looked through the cupcake recipes I had collected online, and chose Red Velvet Cupcakes with White Chocolate Peppermint Cream Cheese Frosting, which is from a Cake Mix Doctor book. I thought it was a great choice, particularly for the season.

We made the cupcakes together, and I frosted them. Each of us decorated 12 of the cupcakes (half of the batch). My son decided to stick the straight part of a candy cane into each of his, because he wanted to make "the North Pole." I decided to sprinkle mine with crushed candy canes.

I'm pretty sure Red Velvet Cake is traditional in the South, but I've never had it before. The red color, produced by a whole bottle of red food coloring, is a little strange. (I actually think the original recipe had something to do with a chemical reaction between baking soda and one type of cocoa powder, but most current recipes seem to use food coloring.) The chocolate taste was mild, even with the addition of mini chocolate chips. I prefer a more pronounced chocolate flavor, but perhaps that's just how red velvet cake tastes. I liked the minty frosting, but regretted adding the crushed candy canes. I found the crunch distracting.

Oh, and Danny's choice for dinner was ... Kid Cuisines. Yep, he has a mom that will make him just about anything, and he chooses a frozen dinner. Go figure. Tom decided to have a frozen pizza and I made myself quesadillas (I'll post the recipe another day). Anyway, here's the cupcake recipe:

Red Velvet Cupcakes with White Chocolate Peppermint Cream Cheese Frosting

• 24 paper liners for cupcake pans (2 ½ -inch size)
• 1 package (18.25 ounces) plain German chocolate cake mix
• 1 package (3.4 ounces) vanilla instant pudding mix
• 1 cup sour cream
• ½ cup water
• ½ cup vegetable oil
• 1 bottle (1 ounce) red food coloring
• 3 large eggs
• 1 cup miniature semisweet chocolate chips

• Place a rack in the center of the oven and preheat the oven to 350°F. Line 24 cupcake cups with paper liners. Set the pans aside.
• Place the cake mix, pudding mix, sour cream, water, oil, food coloring and eggs in a large mixing bowl. Blend with an electric mixer on low speed for 30 seconds. Stop the machine and scrape down the sides of the bowl with a rubber spatula.
• Increase the mixer speed to medium and beat two minutes more, scraping down the sides again if needed. The batter should look thick and well combined. Fold in the chocolate chips.
• Spoon batter into each lined cupcake cup, filling it three quarters of the way full. Place the pans in the oven.
• Bake the cupcakes until they spring back when lightly pressed with your finger, 18 to 20 minutes. Remove the pans from the oven and place them on wire racks to cool for 5 minutes. Run a dinner knife around the edges of the cupcake liners, lift the cupcakes up from the bottoms of the cups using the end of the knife, and pick them out of the cups carefully with your fingertips. Place them on a wire rack to cool for 15 minutes before frosting.
• Meanwhile, prepare the White Chocolate Peppermint Cream Cheese Frosting. When finished, place a heaping tablespoon of frosting on each cupcake and swirl to spread with a short metal spatula or a spoon, taking care to cover the tops completely.
• Place these cupcakes, uncovered or in a cake server, in the refrigerator until the frosting sets, 20 minutes.

White Chocolate Peppermint Cream Cheese Frosting
Makes 3 cups, enough to frost 24 cupcakes (2 ½ inch size) generously

• 6 ounces white chocolate, coarsely chopped
• 4 ounces (half an 8-ounce package) reduced-fat cream cheese, at room temperature
• 4 tablespoons (1/2 stick) butter, at room temperature
• 1 teaspoon peppermint extract
• 2 to 2 ½ cups confectioners' sugar, sifted

• Place the white chocolate in a small glass bowl in the microwave oven on high power for one minute. Remove the bowl from the oven and stir with a wooden spoon or rubber spatula until it is smooth. Set the chocolate aside to cool.
• Place the cream cheese and butter in a large mixing bowl. Beat with an electric mixer on low speed until well combined, 30 seconds. Stop the machine. Add the melted white chocolate and blend on low speed until just combined, 30 seconds.
• Add the peppermint extract and two cups of the confectioners' sugar and blend on low until the sugar is incorporated, 30 seconds more. Increase the mixer speed to medium and beat until the frosting is fluffy, one minute more, adding up to ½ cup more sugar if needed to make a spreadable consistency.
• Fold in up to ½ cup crushed peppermint candy for a crunchy and creamy frosting, if desired.

Thanksgiving & The Martha Stewart Show

Our family had a nice Thanksgiving. We drove to the Chicago area and saw many members of my large extended family.

My Aunt Sue and Uncle Mike host Thanksgiving at their home in Crystal Lake every year. This year there was not only the traditional children's table (the "children" now being in their 20s and 30s), but also a table for six grandchildren! Extra special guests included my cousin, Sarah, who flew in from Dublin, as well as cousin Garrett and his family, who came from Charleston. The menu is generally the traditional turkey with all the fixings, but every year there seems to be something different to try. This time Garrett and Elizabeth fixed an oyster pie, which is a traditional dish from Elizabeth's family. It was tasty!

Then it was on to Lake Geneva, Wisconsin, to see my mom's side of the family, including my 92-year-old Grandma, who is as sharp as ever. After Thursday's feast, we ate pretty simply, but I did get a chance to try the winning recipe from the Southern Living Cook-off. My Grandma and Aunt Cathy made the Sweet Potato Cinnamon Rolls a few weeks ago and froze them. They were very good -- tender and sweet, without a strong taste of sweet potatoes. In Lake Geneva, I caught up with some of my cousins, including Erin, who is by all accounts a fabulous baker. She's starting to throw her hat into the contesting ring, so my fingers are crossed that we see her on some winners lists in 2007!

Speaking of contests, the winner of the desserts category the Southern Living Cook-off (and a contesting friend) was on Martha Stewart Living today! Karen's Sweet Potato Baby Cakes looked great. I have give the show kudos for giving Karen plenty of time to demo the recipe. Karen was pleasant and poised on the show, much like the way she is in real life. I couldn't get the video to work on the Martha Stewart Web site, but here's the link. Martha said she had tasted the recipe and picked it to be on the show. She even took a bite of a cake at the end of the segment. I'll bet it was a thrill for Karen.

Shortly after D. and I won the Airbake cookie contest in March, I received a call from a producer from The Martha Stewart Show. We chatted for about a half hour for a potential segment on cooking with kids. The producer was noncommittal, and I never heard from her again. I always wondered why they never called back. Did I say something wrong on the telephone interview? Did Martha not like the recipe? Or did I just end up on the bottom of the pile of potential guests? Like the guys that never called during my dating years, it will just be one of life's little mysteries.

Happy Thanksgiving!

Thanksgiving preparations have interfered with my blog entries, but I did want to quickly post how thankful I am for those of you who read my blog! It's been fun so far.

Come back next week and I'll have lots of cooking and dining stuff to report!

Happy Thanksgiving!

Monte Alban Mexican Grill

It’s become something of a tradition that whenever B. and I are on our own for mealtime, we go out for something ethnic. He picks the cuisine and I pick the restaurant. For our most recent mother/son meal, B. chose Mexican, and I chose Monte Alban Mexican Grill, which had been suggested by a fellow Rochester blogger.

Monte Alban is located on Ridge Road in Irondequoit. On the outside it appears to be a former Friendly’s restaurant. Inside, though, definitely says Mexico – mariachi music, bright decor, courteous Mexican waiters – even a Spanish-language soap opera playing on a couple televisions.

“This reminds me of Nacho Libre!” B. exclaimed with enthusiasm. That’s my culturally enriched boy!

The menu was fairly extensive and we took some time pondering what to try. I wanted something outside of the realm of gringo tacos and burritos. B. wanted shrimp. We settled on fajitas for two – fajitas with beef, chicken, shrimp, mushrooms, chorizo, peppers and onions.

The heaping, sizzling pan of fajita fixings came with a smaller plate that held refried beans, guacamole, spanish rice, sour cream, and lettuce. Four small tortillas were held in a covered tortilla server. Now, this always happens to me whenever I order fajitas. They never come with anywhere near enough tortillas to hold all the fillings that they are served with. Why is this? Are tortillas an especially expensive accompaniment? Or is it an unspoken rule that you just ask for more tortillas?

Other than the skimpy supply of tortillas, the fajitas were delicious. With such a variety of fillings, it would have been easy to have something overcooked (like the shrimp) or undercooked (like the veggies), but everything was just right. I especially liked the kick the crumbled chorizo added to the dish. We took quite a bit home, and I had it for lunch the next day (with tortillas I had in the fridge).

After our meal we headed up Ridge Road to the Medley Centre (formerly Irondequoit Mall) to do a little pre-Christmas shopping. We entered through Steve & Barry’s, which is a pretty cool store with good deals and fun t-shirts. Stepping into the mall, though, was a downer. There was just a smattering of shoe and sporting goods stores that were open.

When Irondequoit Mall opened in 1990, I worked about five minutes away, and I shopped there all the time. Not only was it convenient, its environment was bright and pleasant, and the two-story design made it easy to get around. But it started to struggle a few years later, and now it's mostly empty. Last year a new owner renamed it the Medley Centre, but I’m hard pressed to see much evidence of progress, other than a new Target store that’s detached from the mall. It was a bummer to see such a beautiful property so deserted.

(Edited in 2008 to add that a more recent review of Monte Alban, from City Newspaper, is here.)

Monte Alban Mexican Grill on Urbanspoon

As seen from my window...

As I was writing what was to be my next post, I looked out my window and saw this:


I grabbed my camera and ran outside. The rainbow was so big that I couldn't fit it into a single frame, no matter where I stood. And then I noticed that there was not one, but two rainbows -- the second one much fainter than the other.


I clicked and clicked but just couldn't capture the beauty of the bright colors illuminated against the dark gray sky. Finally I stopped snapping and just looked.


My neighbors also were outside admiring the rainbow. Say what you want about Rochester's weather. We know great weather when we have it. And we stop and savor it when we do.

A quiet day of baking

I woke up with a hoarse voice yesterday, and today I woke up with no voice at all. This can be a pain, such as when the phone rings, but a day of shutting up is probably good for me. It also has had its amusing moments. When I went to Rocky Mountain Pizza to get a slice, I pointed at the one I wanted. The woman behind the counter responded by speaking a few words at a time, overenunciated her words, and pointing at things in an exaggerated manner. I didn't realize why she was acting that way until she brought my order to me instead of calling out my name. Aha! She thought I was deaf -- not an unreasonable assumption in Rochester, where we have a large deaf population (the National Technical Institute of the Deaf (NTID) is located here). I didn't have the heart to clarify the situation for her.

Anyway, it's a damp, overcast day -- a great day for baking, and that's what I intend to do. I'm going to be doing some contest testing, as there are several baking-related competitions going on.

When contests come up in conversation, some people can't resist giving me ideas. I even had a friend suggest that she give me her ideas, I work them into a recipe, and we split the prize money. I tell these people that the hardest part isn't coming up with an idea -- it's turning an idea into a good recipe. This photo of a recent disaster is an example. The idea was a sort of crumb cake, which sounds simple enough. Well, obviously they didn't turn out the way I envisioned. I also thought they tasted way too sweet, but the rest of my family didn't agree. They all were eaten over the course of a few days. Although the cakes didn't wind up in the trash, the concept probably will.

While I'm on the subject of contests, I thought I'd mention that the “Desperate for Dinner” contest winner recently appeared on “Good Morning America.” The winning recipe was Shrimp ‘n Grits for the Discriminating Housewife. The other winning recipes were Sunset Chicken and Rice, White Chocolate Raspberry Mousse Cake, and Desperately Comforting Roast Beef. Considering that the contest referred to dinner, I thought it interesting that a dessert was among the winners. Anyway, the video and recipes can be found at the ABC News Web site. That really was one of the weirder contests I’ve seen.

Two corn breads

When I made a Mexican themed meal for friends a few nights ago, I made two different corn breads– a dependable favorite and something new that sounded interesting.

My usual favorite corn bread recipe is from "The Moosewood Cookbook," the version that was printed in 1977 and is out of print. I received it as a gift from my friend, Marie, in 1991, the year before the cookbook was revised for the first time. It’s a charming cookbook because it is hand-lettered and illustrated by Mollie Katzen, who has gone onto bigger stuff since 1977. Because of the cookbook, I’ve always wanted to go to the Moosewood Restaurant, which is in Ithaca, NY. It’s just a couple of hours away, but somehow I’ve never made it there.

The recipes I’ve tried from the cookbook have had varying results, but the recipe for cornbread is a favorite. Southerners might frown on the recipe because it has a sweetener and it’s not baked in a cast iron skillet. Well, I’m a Northerner and I like it this way. Here’s the recipe:

Delicious Corn Bread
from "Moosewood Cookbook," the 1977 edition
Makes one 8-inch pan – I often double and put in a 13 by 9 pan.

¼ cup honey
1 cup buttermilk
1 egg
1 cup yellow corn meal
1 cup unbleached white flour
2 tsp baking powder
½ tsp baking soda
½ tsp salt
3 Tbs. melted butter

1. Beat together egg, buttermilk and honey.
2. Mix well together all dry ingredients.
3. Combine all ingredients, including melted butter, and mix well.
4. Spread into buttered 8-inch square pan.

Bake at 425 for about 20 minutes – start checking it earlier.

I chose the second recipe for the sole purpose of using up butternut squash. I belong to a CSA (community-supported agriculture program) and receive a delivery of organic veggies every week in the summer and fall. This time of year always brings lots of winter squash and cabbage, neither of which I care for. As a result, I’m always looking for cabbage and squash recipes I actually like. Unfortunately, this wasn’t such a recipe. Although the bread was colorful, it was less than an inch thick and the texture was spongy. I also would have liked it sweeter, although that may have been my fault, as I used butternut squash instead of acorn. If I make it again, it will be with a lot of changes.

Squash Corn Bread
from "Creme de Colorado Cookbook"
10-12 servings (1 9 by 13 pan)

1 cup yellow cornmeal
1 cup plus 1 Tbsp all-purpose flour
1 Tbsp packed light brown sugar (I used dark)
5 tsp baking powder
1 tsp salt
½ tsp dried cumin
½ tsp dried salad herbs (I don’t know what these were. Used Italian seasoning.)
2 Tbsp minced fresh parsley (used 2 tsp dried)
dash of cayenne pepper (used chipotle)
1 cup spaghetti squash or acorn squash, cooked and mashed (used butternut)
2 eggs
1 cup milk
¼ cup olive oil
½ cup diced Monterey Jack cheese
1 2-oz jar pimientos (could only find a 4-oz jar. Used about ½ and diced them.)
1 4-oz can diced green chiles
¼ cup sliced black olives, optional (didn’t use)

In large bowl, mix together cornmeal, flour, brown sugar, baking powder, salt, cumin, herbs, parsley and cayenne pepper. In separate bowl, blend squash, eggs, milk, oil, cheese, pimiento and green chiles. Pour dry ingredients into squash mixture and blend. Pour squash-cornbread mixture into greased 9 by 13 pan. Arrange black olives on top (I didn’t do) and bake at 425 for 25-30 minutes or until a wooden pick inserted near center comes out clean.

Fresh cranberry salsa

I made a Mexican themed dinner for friends last night. The most successful experiment was Fresh Cranberry Salsa. I found the recipe in “Cooking with Too Hot Tamales,” which I checked out from the library. And, of course, I didn’t do it exactly as written.

The recipe was meant to be a component of Turkey Tamales with Fresh Cranberry Salsa. Tamales are a lot of work– plus one of the ingredients was Turkey Braised in Black Mole, which was another recipe with a long list of ingredients. I didn’t have that kind of energy, so I just made the salsa and served it with chips.

It was crunchy, sweet, a little tart and a little spicy. I’m sure it would be a nice complement to turkey. I would vastly prefer this to the super sweet canned glop that is on the Thanksgiving menu every year. I’m not hosting Thanksgiving, but I might offer to bring it along.

Here’s the recipe, as well as my notes. I cut the recipe in half.

Fresh Cranberry Salsa


1 pound fresh or thawed frozen cranberries (I used ½ pound of frozen and didn’t thaw them before starting the recipe. Note that a bag is 12 ounces, so I used more than half of the bag.)
1 cup sugar (used a scant ½ cup)
2 teaspoons grated orange zest (used 1)
3 Granny Smith apples, peeled and diced (Used one. I might leave the peel on for color.)
3 oranges, peeled, seeded and diced (used 2 Valencia oranges)
4 serrano chiles, stemmed and diced with seeds (I couldn’t find serrano chiles. I used 1 jalapeno without seeds. I’d use 2 or more next time.)
1 bunch cilantro, leaves and stems, chopped (I’m not a fan of cilantro. I used a little bit.)
1 bunch scallions, chopped (I used some scallions and some red onions)

Finely chop the cranberries in a food processor or by hand (I used a food processor). Combine in a bowl with the remaining ingredients and mix together. Set aside at room temperature 1 hour and then chill until ready to serve. Store in the refrigerator as long as 3 days.

(I thought the end product was going to be too chunky to serve with chips. I threw it all into the food processor and pulsed a few times to get it a bit finer. You wouldn’t have to do this if you served it with turkey.)

Contesting article and Web site

It's been interesting that my posts about cooking contests receive a lot more comments than the ones about cooking or dining. For what it's worth, I won't have much to report in the way of contests for awhile, because I don't have many entries out there in the pipeline. Some contesters submit their entries, keep track of deadlines, and wait with baited breath to see whether they won. I prefer to submit entries and then forget about them. If I win something, it's a fun surprise. If not, on to the next contest.

Anyway, there's an article in the New York Times about contesting and specifically this year's Sutter Home Build a Better Burger contest. I wasn't at the contest, but the information about contesting strikes me as being fair and accurate. Unfortunately, the New York Times makes you register and give them info for you to get access to their site. I won't do this for most sites, but, well, it's the New York Times and I wanted to see the article. Anyway, here's the link to the article.

I thought I should mention that if you're interested in entering cooking contests, the Cooking Contest Central Web site is a tremendous resource. For a fee of $25 per year, you get notified of just about every contest that's out there. There's also a forum where people post questions and answers, and hear about each other's contest experiences. Some of the content is free, so check it out!

Lunch at India House

My cousin, Michele, and her husband, Kevin, are both lawyers. But instead of amassing fortunes in legal practices, they are currently living in Pune, India, where Kevin provides legal services to poor people and Michele teaches at a university. Michele sends email dispatches from time to time, the most recent being about the foods they eat there. Her emails have given me a serious hankering for Indian food.

I was introduced to Indian food by a friend named Karuna. She was from Bangalore, India, and lived in Rochester when we were both in our 20s. One night a group of us went to an Indian restaurant (in the former Loehmann’s Plaza), and she ordered an interesting and delicious assortment of dishes and condiments for us all to try. It was a fun evening and a great way to try a new cuisine. At about the same time, I went on a business trip to London and had an evening on my own. Having heard that London had great Indian food, I ventured to an Indian restaurant and was able to select a delicious meal thanks to Karuna. Unfortunately, I lost touch with Karuna when she moved back to India – if only we had email back then!

Anyway, when a friend suggested that we go out for the lunch buffet at India House restaurant, I gladly agreed.

India House is on Route 96, about five minutes away from Eastview Mall. I've been to the India House in Rochester a few times, but I hadn’t been to the Victor location. The Victor location appears to get a lot less lunchtime traffic; only about five tables in the large dining room were occupied.

Our waitress was friendly and helpful. She took us to the buffet to explain all the dishes, and was prompt in refilling our beverages.

That day, the buffet items included ginger cauliflower soup, cauliflower fritters, tandoori chicken, chicken makhani, beef curry, rice, a carrot and potato dish, daal (lentils), nan (bread) and rice pudding. A cold area held some veggies, pickles, and condiments including tamarind chutney and raita (yogurt sauce). From what I can discern from Michele’s emails, these dishes are mostly representative of the Northern part of India.

The cauliflower fritters had a spicy batter that nicely complimented the mild, tender cauliflower. Although they were deep fried, they weren’t heavy or greasy. The tandoori chicken was moist and flavorful. The chicken makhani, on the other hand, had dry chicken, and the pieces of beef I got in the curry were gristly. I enjoyed the carrot and potato dish; the sweetness of the carrots was a nice contrast to the spiciness of the other dishes. The daal was soupier than some versions I’ve had. Frankly, I would have been happy with just the warm nan dipped in daal and raita. But that’s just me. Lunch, with beverages and tip, came to $12 each.

When I’m shopping at Eastview Mall this Christmas season, I just may head back down to the India House in Victor to get a break from the crowds. While I'm there, I'll fondly think of Michele, Kevin, Karuna, and my brief stay in London. (Cheers to Michele and Kevin! Hope you’re safe and happy!)

India House on Urbanspoon

Nestle Flavorologist for a Day

Last week, our family was in Southern California so that my son could experience being a Nestle "Flavorologist for a Day." What, you may ask, is a Flavorologist? Well, that’s one of ten kids who invents a cool new ice pop flavor and wins a trip for four to Bakersfield, California, for a visit to the world’s largest ice cream factory.

B., my older son, invented a flavor called Bee Sting -- a combination of honey and sour lemon. Even though I advised him that more than one entry would increase his odds of winning, he stuck with just that one. I later learned that Nestle received more than 8,000 entries! I wasn’t sure what to expect of the trip, but it exceeded any of my preconceived notions. (Sorry, this gets a bit long.)

Thursday: Welcome to Bakersfield

When we arrived at the airport, a driver was waiting in the baggage claim area with a sign with B.’s name on it. After we got our luggage, we walked outside to find that a stretch limousine was waiting there to take us to the hotel. This was really big stuff for the kids! The limo was even stocked with pop for us to enjoy.

When we checked in at the hotel, we were surprised to find that Nestle had reserved two adjoining rooms for us. This was my turn to be excited! Our travel budgets don't allow us to do that, so that was a huge treat. During our down time, I loved not having to listen to Pokemon or whatever they were watching on TV.

Our first official event was dinner at John’s Incredible Pizza, which I can only describe as a Chuck E Cheese on steroids -- better food and more fun stuff to do. Our private room was lined with posters that had a picture of each child, the flavor they had invented, and a picture they had drawn of the pop. We were introduced to the head taster at Nestle (yes, there is such a job), John Harrison.

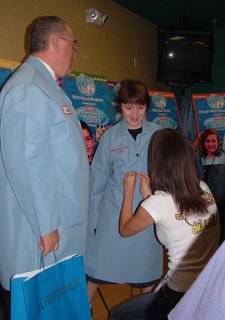
John explained that he wore a lab coat to work every day. Then he presented each Flavorologist with his/her own lab coat that had been embroidered with his/her name, flavor, and the year. In addition, every member of the family received a white t-shirt with the Flavorologist logo in the front, along with that family member’s ice pop flavor on the back. Needless to say, the kids were thrilled.

It was all we could do to coerce the kids to wolf down a piece of pizza, because there was lots of great stuff to do! Adults and kids were all given cards for playing games, riding bumper cars, and driving go-karts. It was a blast.

Friday: Fun at the Factory

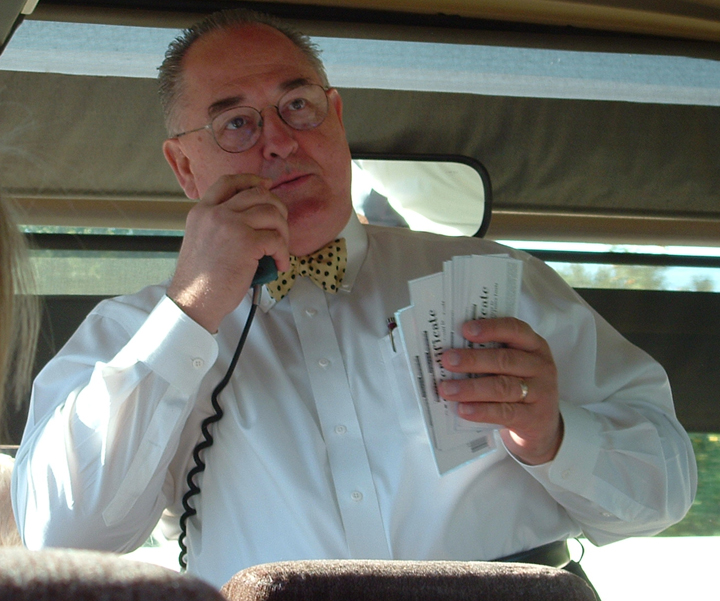
On Friday morning, a bus arrived to take us to the plant. On the way, John Harrison asked us trivia questions about ice cream – and people who guessed the right answer got coupons for free ice cream. One question of note: Who invented Cookies & Cream ice cream? The answer: John Harrison himself! That sealed John’s celebrity status among kids and adults alike!

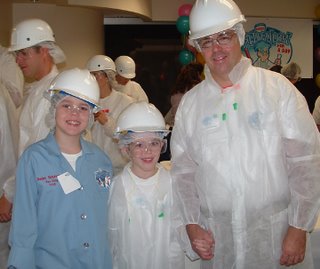
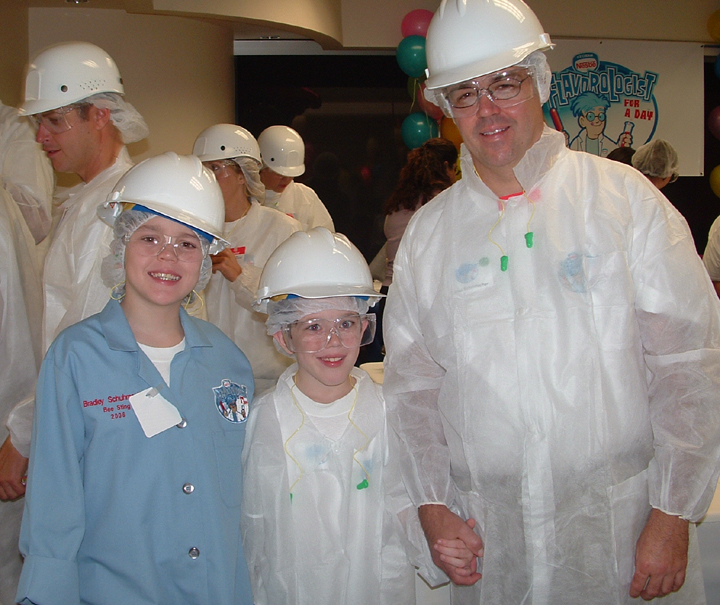
We were greeted at the plant with balloons and a big "welcome" sign. Employees cheered as the young VIPs entered the building. After that, it was time to suit up for our plant tour. We donned hair nets (and beard nets for the men), hard hats, protective glasses, ear plugs, special coats, and booties. You think I’m going to post a photo of me in that getup? Think again!

We toured the plant in small groups; ours was led by John, the plant manager. The plant was spotlessly clean, all shiny stainless steel. We saw many products being made, including Drumstick cones, Dibs bite-size ice cream snacks, peppermint ice cream, ice cream sandwiches, fruit bars, and Skinny Cow low-fat ice cream sandwiches. We tasted the products as we toured. John told us to feel free to take a bite and discard the rest. Yeah, right. By the end of the tour, I was practically shaking from the sugar buzz.

A few random surprises:
- The plant wasn’t cold.
- There wasn’t an overwhelming smell in the plant. When you were up close to an individual line, you could smell chocolate or berry, but it wasn’t pervasive.
- The cookies for ice cream sandwiches are very hard and crunchy when they come off the line. In the package, the cookies absorb moisture from the ice cream, which softens them.

John was clearly proud of the plant and was enthusiastic about sharing it with the kids. D. asked John how they melted all the chocolate chips for the melted chocolate on the Dibs and Drumstick lines. John not only explained that they buy the chocolate already melted, but he also took D. over to the vat of chocolate, opened it, and lifted him up so he could see inside. I resisted the urge to follow along and dive in.

Next was a presentation from flavorists that work for IFF (International Flavors and Fragrances), a company that makes the flavors Nestle uses in its products. They started by asking everyone to describe the five basic tastes. They heard sweet ... salty ... sour ... bitter ... and... silence and scratching of heads...

“Umami,” I piped up. Yep, the fifth kind of flavor is umami (pronounced oo-mommy). It’s described as a meaty or savory flavor.

I could see Tom’s eyes roll to the back of his head.

“Yes, I’m the Rain Man of food,” I whispered. “Umami ... definitely umami.”

Anyhoo... IFF had flavors for the kids to taste. Then they were given instructions for mixing some together and then guessing the flavors. Fruit punch and bubble gum were especially tricky.

Next, we went to a different room to taste some wacky flavors that Nestle had created. I tried gingerbread, which I enjoyed, although the flavor seemed incongruent with the ice pop texture. I passed on tasting dill pickle and macaroni & cheese, but was goaded into trying the cheeseburger pop. Yes, it tasted like a cheeseburger, complete with pickle and mustard ... but it was just plain awful. Worse yet, the flavor coated your mouth and stayed with you. I drank quite a bit of water to get rid of it. (B. didn't like it, either.)

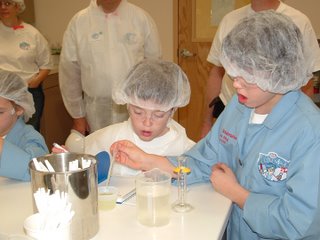
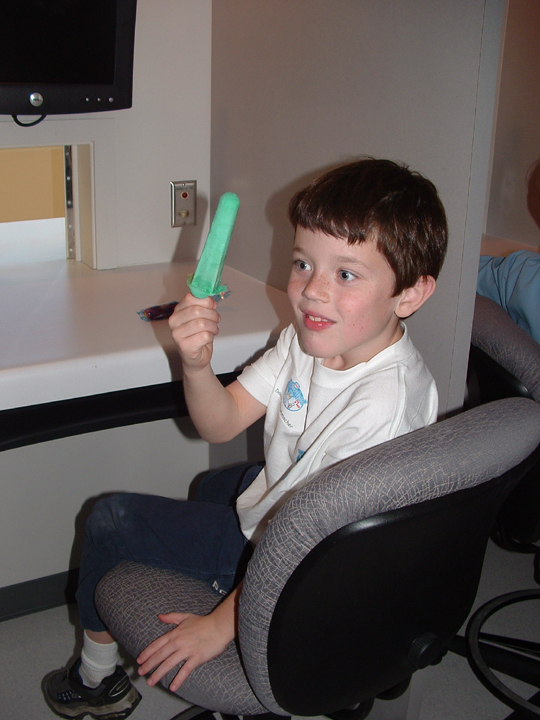
Next, we broke up into groups to visit the labs where ice pop products are developed. The room we entered looked just like a high school chemistry classroom, complete with beakers and pipettes. The kids were instructed to measure a certain amount of base (which was like simple syrup) into a beaker and then they could choose from five fruit flavors to add. Next the kids added colors, also measuring precisely using pipettes. Once that was done, they poured their concoctions into molds, which would be frozen for them to try. B. and D. mixed several flavors together and colored the pop a bluish green.

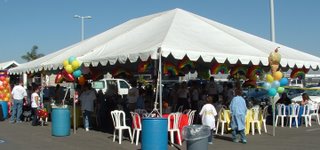
Then it was time for lunch in an outdoor tent. True to form, Nestle had some surprises in store. We were greeted at the door by Scooby Doo, who escorted us to the tent. Lunch was basically sandwiches (including PB&J) and salads. It felt good to dilute some of the sugar in my system.

After lunch, we heard from John Harrison about his job. He inspects every batch of every product for three criteria – appearance, texture, and flavor. If he finds a batch that isn’t right in some aspect, he has to take samples from every pallet of that batch to figure out where the problem occurred.

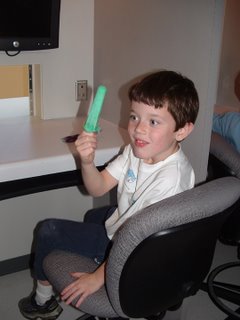
After John spoke, the kids took turns tasting the ice pops they had concocted in the labs. They went into a long room that is used for consumer testing. It was divided into cubbies. The kids were handed their pops through a little door. B. and D. gave their blue-green pop a thumbs-up. I was surprised that the color looked nicer than it had as a liquid.

While the kids were tasting their pops, some of us parents grilled John Harrison about his job. A few tidbits:
- John doesn't swallow the ice cream he tastes on the job.
- He uses a gold spoon for tasting, because it gives him the truest flavor and it doesn't tarnish.
- "Slow Churned" isn't a marketing slogan. It is a manufacturing process that makes the texture of low-fat ice cream as creamy as the regular stuff. (I'm a fan of Edy's Slow-Churned French Silk ice cream, which we weren't lucky enough to enjoy there.)

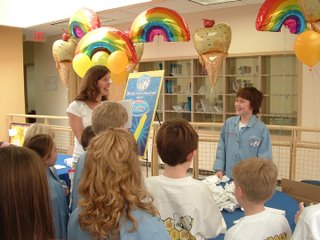
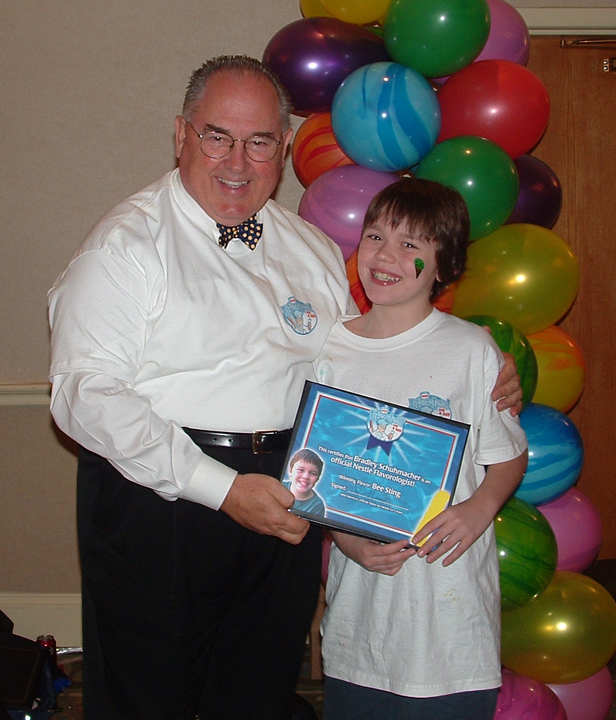
The final item on the agenda was tasting the Flavorologists’ creations. Tables were set up for each flavor with a poster and a pile of the ice pops. One flavor at a time, a Nestle person read the description of the pop, and the Flavorologist told everyone how he/she came up with the idea. The Flavorologist then opened the paper and tasted his or her creation, and said whether or not he/she liked it. B. was second. When he ripped it open, he saw that it was a yellow and black swirl that looked pretty cool. The surprise of his pop was that they had added a substance that would briefly cause your tongue to tingle. He was thrilled with it.

Once the Flavorologists had had their turns tasting their own pops, everyone got a chance to taste all of the flavors. Our family's reviews:
- B. loved his (he ate three of them). He also liked Lemon Meringue O’Tang, Bananasaurus Rex, Pink Princess Fluff and Snickerdoodle Dandy.
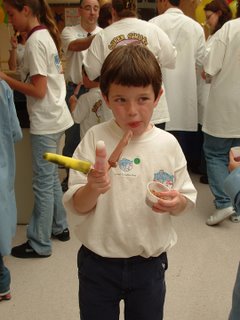
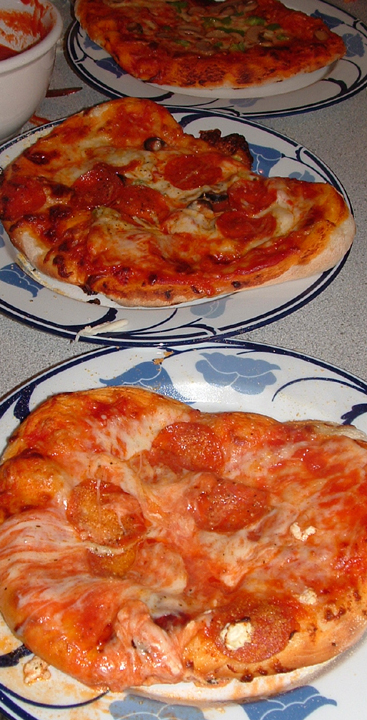
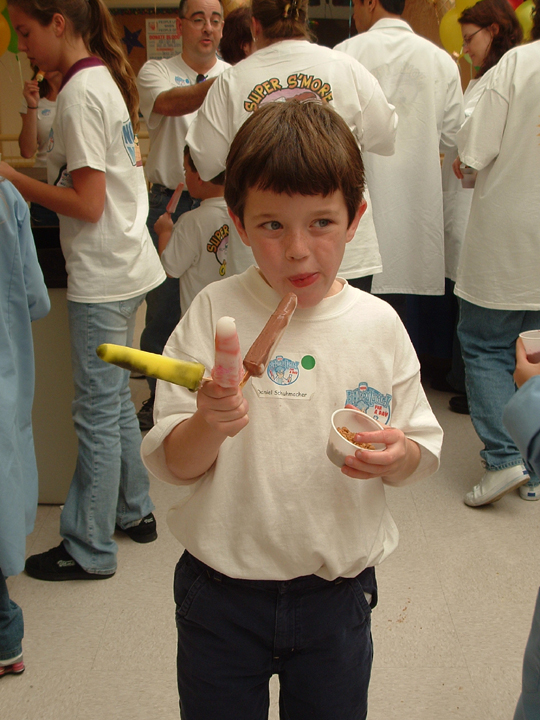
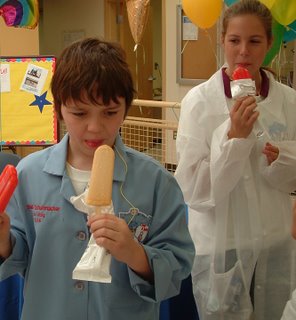
- D. tried all of them and gave them all a thumbs-up -- well, except for the Pizza Pop. (That’s him taking his tasting very seriously. The Bee Sting pop is on the left.)
- Tom’s favorite, besides Bee Sting, was Snickerdoodle Dandy.
- My favorite, besides Bee Sting, was Lemon Meringue O’Tang, which tasted just like lemon meringue pie, and was served with cups of graham cracker crumbs for dipping. I liked it so much that I was cajoling the Nestle people to manufacture it.

After that, the buses took us back to the hotels for some down time (and, for several kids, swimming time).
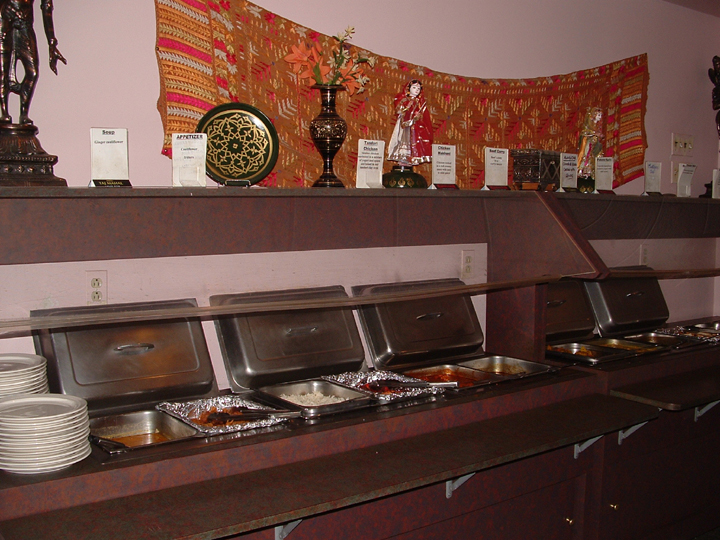
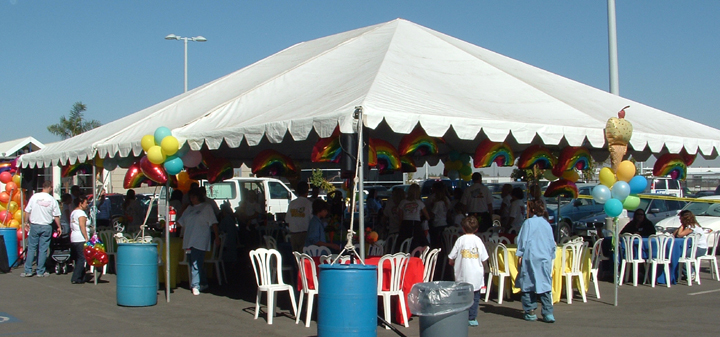
Friday Evening: A Super Celebration

The final part of Friday’s festivities was an awards banquet, and once again Nestle made it a great event for children and parents alike. Cotton candy, face painting, and several board games were set up to amuse the children. One buffet line served kid fare like hot dogs and mac and cheese, and a second line had a beef and a chicken entree as well as salads and side dishes. There was even a beautiful tray of non-ice cream desserts.

For the awards ceremony, the Flavorologists were presented with a certificate, plus a Flavorologist backpack containing coupons for free ice pops, a $1,000 savings bond, and several surprises (I don’t want to give everything away for people who go in the future). Most everyone was delighted to hear that they would be receiving some of their own ice pops in the mail. Plus, we were told that Nestle would be in touch to arrange ice pop parties for each Flavorologist’s school!

Want to be next?

I’ve heard through the grapevine that some kids from both of my sons' schools are already at work on ice pop flavors to enter next year. I’d REALLY encourage them to enter (assuming Nestle continues with the contest next year). It’s a lot of fun, you learn interesting things, and you get to take home cool stuff. (If Mom or Dad are super serious about healthy eating, and will get nervous about a day with a lot of sugar, this probably isn’t the trip for them. Take Grandma or Grandpa instead.)

Here are some tips to get you started:
1. Invent a flavor that you would actually be excited about eating – because you will! In other words, you probably don’t want to invent the “vomit pop.”
2. Once you think of flavors you like, think about a really fun name to go with it. As an example, “Lemon Meringue Pie” is a good idea ... but “Lemon Meringue-o-Tang,” one of this year’s winners, is even better!
3. Look at this year’s winners. You don’t want to repeat what’s won in the past.
4. I’m sorry to say ... it’s for kids under the age 12, so some middle schoolers won’t qualify next year. But Nestle holds other contests; go to its ice cream Web site to look for them!
5. Enter even if you only have one good idea. That’s all it took for B. to win!
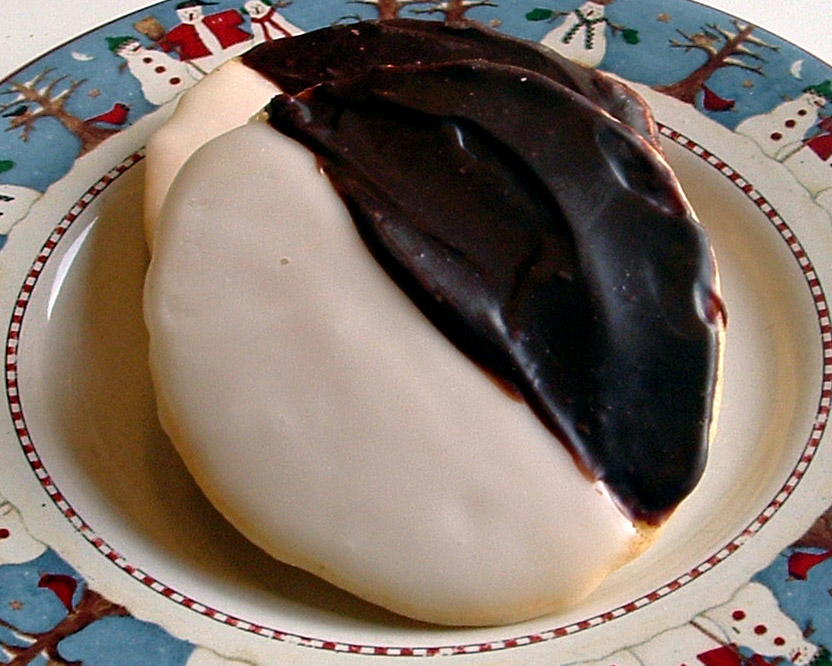
Halloween treats

I haven't posted in several days because our family was in sunny California. The highlight of the trip was the Nestle "Flavorologist" experience my older son won in an ice pop contest. It will take me a couple of days to write that up, so I thought I'd post the goodies I made for Halloween in the meantime. (May I just take a moment to note that our Halloween weather was beautiful and in the mid-60s?)

I wanted to make up little gifts for the neighbors who took in our mail and took care of Charlie (the dog). Because I had so little time, I decided on a Halloween bark.

I got the original idea from the Cooking Light Great Food bulletin board, but that version was too sweet for me. (My friend, Marie, says there's no such thing as "too sweet." Well, trust me, there is and this was.) I've tinkered with it, and now it's the way I like it -- a salty, sweet, and nutty mixture held together with a sweet white coating. I make barks often when I'm in a pinch. I always make them "by eyeball" and change them depending on the season and the contents of my pantry. Here's the way I made this year's Halloween bark, with approximate amounts.

Howlin' Halloween Bark

1 ½ rows Oreos, chopped
About 2 cups mini pretzels (I use little ABC pretzels.)
About ½ can cocktail peanuts
½ of a large bag of Reese’s pieces
Large bag white baking melts (about 2 pounds)
1 tablespoon oil
1/2 cup (or so) candy corn, chopped
Halloween sprinkles, if you have some

Spread 1st four ingredients onto lightly greased 13 by 9 pans. The ingredients should almost cover the bottom of the pans in a single layer; set aside. (If desired, reserve some of the Reese’s pieces to put on top.)

Melt baking melts and oil in the microwave, stirring every 30 seconds, until smooth.

Drizzle most of the melted stuff immediately over cookie mixture and stir to coat evenly (some of the cookie will break up and make the white stuff look a little grayish). Drizzle the rest of the melts over the mixture and spread around with spatula (this will make it look a little nicer). Top with candy corn and sprinkles, if you have them. Lightly press candy into mixture.

Cool until firm. Break into pieces. Store in airtight container.


My sons were invited to a last-minute trick-or-treating gathering, and thought I'd bring something that both the kids and adults would enjoy, and that WASN'T SWEET. I decided on deviled eggs.

My Aunt Barb makes the world's best deviled eggs and here's what she does, in recipe form:

Aunt Barb's Deviled Eggs

Eggs (as many as you need)
Marie's Cole Slaw Salad Dressing (to taste)
Paprika and/or bacon bits, for garnish

Hard boil the eggs. Peel, cut in half, and remove the yolks. Mash the yolks, then add cole slaw dressing, to taste. Stuff the yolks back into the eggs and garnish with paprika and/or bacon bits. (Yes, it's that simple.)

My problem with this recipe is that I buy the cole slaw dressing, use a few tablespoons, and the rest of the jar goes to waste. I'm the only one in the family who eats cole slaw, so there's no reason for me to use a lot of this dressing. So I always experiment various ingredients to try to make my eggs taste like Aunt Barb's. They never do, but everyone seems to eat them anyway.

A couple of tips for deviled eggs:

1. Boil a few extra eggs. I like mounded yolks in deviled eggs, so I use the extra yolks and discard the whites that are pitted after peeling.

2. Don't use your Braun immersion blender to mash the yolks and mix up everything. It seemed like a clever idea when I tried it last night. I noticed that it seemed to be going slower and slower, but stupidly kept on using it. Then smoke started coming out of the top of it. I crossed my fingers that it just overheated and it would work today. Nope. That baby is fried. I killed the thing in less than a year. My husband is going to have a fit, because it was his favorite milk shake maker.

Anyway ... I garnished a few of the eggs with black olives cut up to look like spiders. The first time I did this was for a party a few years ago. I put an olive spider on every egg, and it took about an hour for my husband to cut the olives into skinny spider legs and for me to affix them to the yolks just so. At the party, I noticed most of those olive spiders had been picked off of the eggs and abandoned. After that, I just do a few that way -- and I can count on my older son to eat them.

Hope everyone had a fun and safe Halloween.